Photoshop: maak tekst met een glaseffect
In deze praktische tip laten we u zien hoe u Photoshop kunt gebruiken om tekst in een glaseffect te maken.
Creëer een glaseffect met Photoshop
In de volgende stappen laten we u zien hoe u een realistisch glaseffect kunt creëren met Photoshop.
- Start "Photoshop" en open de gewenste afbeelding.
- Gebruik vervolgens het tekstgereedschap in de linker verticale werkbalk om een tekstveld op uw afbeelding te tekenen en de gewenste tekst erin te schrijven. U kunt de toetsencombinatie Ctrl + T gebruiken om het tekstveld te markeren en, terwijl u de Shift-toets ingedrukt houdt, deze naar wens vergroten over de hoekpunten.
- Nadat u de tekst hebt ingevoerd, dubbelklikt u op het tekstniveau om de vulopties te openen. Zet de dekking op ongeveer "10" en de grootte op "32" onder de kop "Naar buiten schijnen" (zie screenshot).
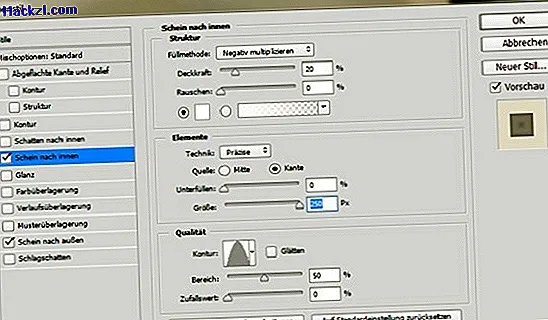
- Stel vervolgens de dekking in op ongeveer "20", de kleur op "Wit", de techniek op "Nauwkeurig", met ondervulling op "0 procent" en de grootte op "100 procent" onder de optie "Naar binnen gloeien". Wijzig de contour in dit bewerkingsvenster in kwaliteit (stap 1).
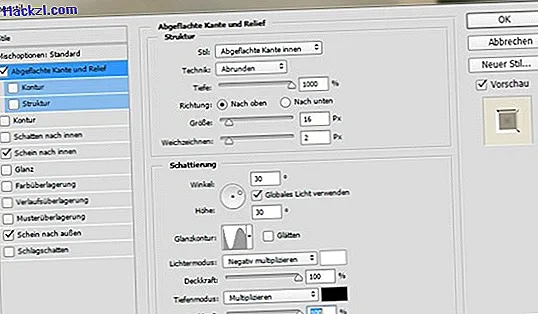
- Vervolgens moet u de diepte instellen op 1000 procent, de grootte op ongeveer 16 pixels en een kleine mate op "Vervagen" onder het beeldverwerkingspunt "Afgevlakte rand en reliëf" onder "Structuur" (stap 2).
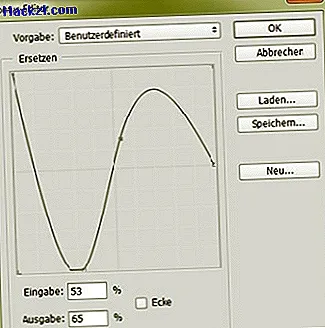
- Voor een gedetailleerd glaseffect moet u uw eigen contour maken onder "Shading" door de lijn te veranderen (zie stap 3). Sla uw voltooide contour op en laad deze vervolgens.
- Zet ten slotte de dekking in dit venster op 100 procent. Sluit vervolgens het venster Laagstijl.
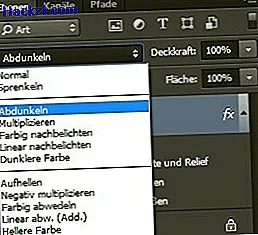
- Als laatste stap moet u nu de binnenkant van uw tekst donkerder maken bij "Normaal" (stap 4).
- Tip: onder "Filters", "Vervormingsfilters" en "Trillingen" kunt u natuurlijk ogende vervormingen aan uw glaseffect toevoegen.

Nieuwste video's
Stap 1: Stel de laagstijlopties in voor "Glow Inside".
Stap 2: Stel opties in onder "Afgevlakte rand en reliëf".
Stap 3: maak uw eigen glazen contour.
Stap 4: Maak de "letters" donkerder.